

How we’re keeping a 1924 house warm this winter without replacing the windows or the boiler: find the drafts, seal them the old-fashioned way, layer the windows, and put the heat where we live.
This post is for you if…
- You’re dreading your old house heating bills this winter and you’re not ready to replace the system.
- You have drafty and cold pockets in your old house and need flexible options to bring the warmth.
- You want a warmer house without losing the original windows, doors, and character that made you buy the house.
The first boiler fuel refill of the season cost us nearly double what it did last year. That one (completely shocking) bill kicked us into high gear to improve how we’ll keep our old house warm this winter.
We’re not ripping out the heating system this year. I love our boiler heat, and I’d like to keep it going. Instead, we’re doing two things: keeping more of the heat we pay for inside the house and adding warmth exactly where we need it. Meanwhile, we’re researching what the right long-term system looks like for our 1924 house.
How to Keep an Old House Warm: The Short List
If you only do a handful of things this winter, do these. Each one keeps heat in or puts it where you live, and none of them touch the character of the house.
Some links may be affiliate links, meaning I may earn a small commission if you choose to purchase, at no additional cost to you. I only share products used in my own home, or have researched and feel confident recommending.
| Cozy Categories | The Rosemont Shortlist | Why it works |
|---|---|---|
Find the drafts See the full list ↓ | Make your winterizing plan TOPDON Duo Thermal Imaging Camera · Check Price → | Shows exactly where heat escapes, so you fix the right first things first. |
Keep heat in Doors and windows See the full list ↓ | Loved by old house owners Heritage Supply Co. Spring Bronze Weatherstripping · Check Price →Loved by old house owners Indow Thermal Window Inserts · Learn More →For proven efficiency LEVOLOR Cordless Thermal Blackout Cellular Shades · Check Price → | Seals door gaps with no glue, foam, or damage. Interior storms cut heat loss through old glass by 63% in testing, and tight cellular shades cut it 40% or more. |
Bring the targeted heat See the full list ↓ | Our next buy Dr Infrared DR-968 Heater · Check Price →Used at Rosemont Schluter Ditra-Heat-E-RS1 Thermostat · Check Price →Used at Rosemont Empire Cast Iron Stove · Check Price → | Adds heat where you live: infrared for a room without a radiator, radiant floors on a schedule, and a stove that keeps running when the power goes out. |
How to: Find the Drafts in Your Old House
Before you buy a single fix, figure out why a room feels cold. In an old house, “cold” usually means one of three different problems, and each one has a different solution.
- A draft is moving air: around a door, along a window sash, through a gap at the baseboard. You feel it as an unwanted cold breeze interrupting your day.
- A cold surface is a big area of glass or a cold exterior wall that pulls heat off your body. The air can be warm around you and you’ll still feel chilly sitting next to it.
- A heating problem is a radiator that stays cool, a vent that barely blows, or a room the system just doesn’t reach. No amount of weatherstripping fixes that. Call your heating pro.
How to find them:
- Let a breezy day inform you. Run the back of your hand slowly around door edges, window sashes, outlets on exterior walls, and the baseboards.
- Watch the smoke. A lit incense stick held near a suspected gap will waver or stream sideways if air is moving.
- Take the temperature. An inexpensive infrared thermometer shows you where you’ve got cold spots. A thermal camera, including the small ones that plug into a phone, shows you the whole wall at once and makes drafts look like blue streaks.

TOPDON Duo Thermal Imaging Camera
See exactly where your heat is leaking. Works with USB-C compatible smartphones and tablets.
Type: Phone thermal camera Works with: USB-C iPhone, iPad, Android Price: $$$
Make a simple list, room by room: draft, cold surface, or heating problem. That list helps you prioritize your “Mission: Warmth” projects.
How to: Keep the Heat in Your Old House
The best heat is the kind you pay for that doesn’t leak out your doors and windows. At Rosemont, that means two old-fashioned fixes: spring bronze weatherstripping and door sweeps.
Winterize Old Doors Without Damaging Them
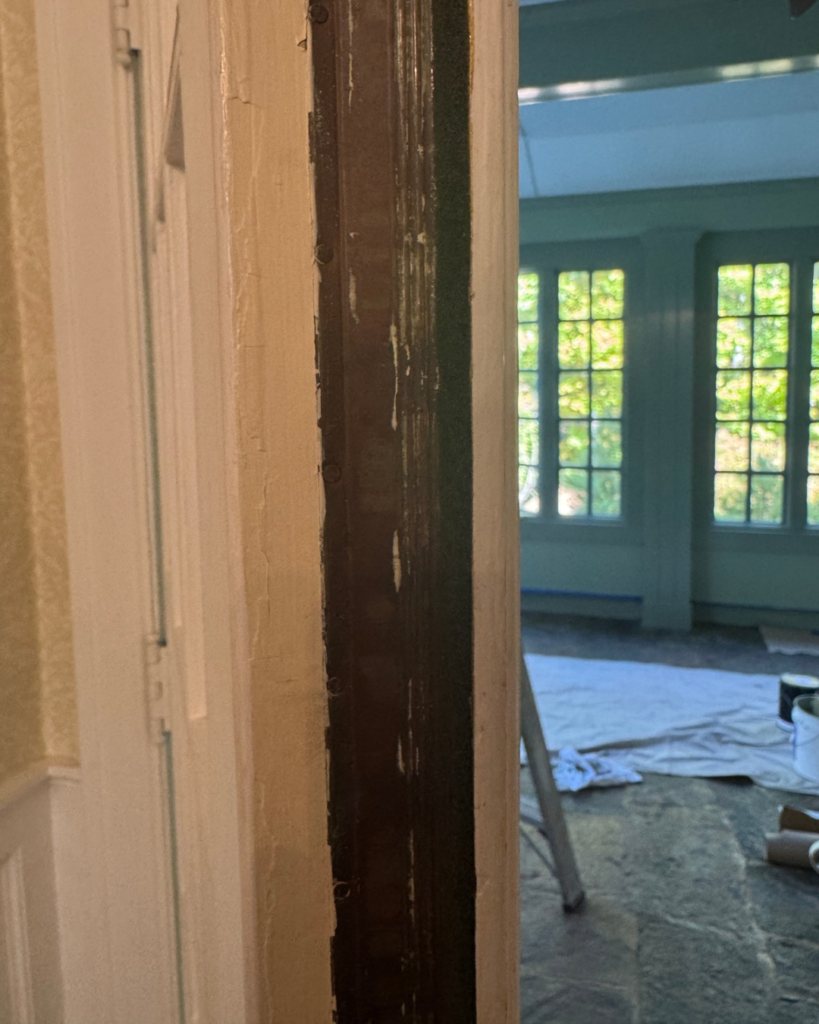
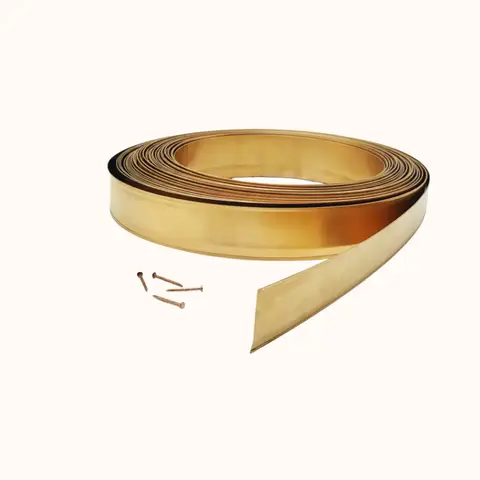
Spring bronze (copper) weatherstripping is a thin metal strip nailed into the door jamb. Its flange springs outward and presses against the edge of the door when it closes, sealing the gap. It’s been used in old houses for generations, and it doesn’t crack, rot, or turn gummy the way foam tape does.
One lesson from our own doors: don’t paint over this weatherstripping. Paint will stiffen the springy flange so it can’t press perfectly against the door, and it seals less with every coat.
If yours has been painted over (like some of ours has by previous owners), cleaning the flange may bring some of the spring back.
We’re tackling this project as we refinish doors throughout the first floor and will report back on how it went.
Why is spring weatherstripping so wonderful in old houses?
- A lifespan that makes sense for old houses. Spring bronze resists corrosion and can be effective for up to 100 years. We love that!
- It works with expanding and contracting wood. Old houses breathe. As door jambs expand and contract with the seasons, the “V” keeps a tight seal.
- It’s nearly invisible once the door is closed, and is easily adjusted if the seal needs to be “resnugged.”
LOVED BY OLD HOUSE OWNERS
Heritage Supply Co. Spring Bronze Weatherstripping
The old-house way to seal doors & windows. Looks period correct, is effective, & lasts up to 100 years? Sign me up!
Material: bronze or copper Install: small brads Price: $$ per roll
You can also consider adding Door sweeps to close the gap under exterior doors. A brush or flexible sweep screwed to the inside bottom of the door seals against the threshold without changing the door itself.
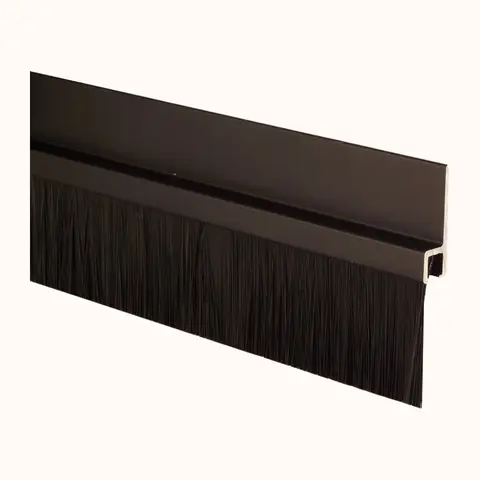
FUTURE WINTERIZING PROJECT AT ROSEMONT
Pemko Dark Anodized Bristle Weatherstrip
Seals uneven (and even – but who has those?) surfaces.
Type: Nylon brush Finish: Dark anodized aluminum Price: $
Are Interior Storm Windows Worth It?
If you do one big thing for your old windows, make it interior storms. They’re the most effective window fix in the research below, and they leave your original windows exactly as amazing as they are.
An interior storm is a second pane that fits inside your existing window frame, creating a layer of still air between it and the old glass. From the street, nothing changes. The original sash, wavy glass and all, stays perfectly imperfect. We have a mix of interior and exterior storms, and are considering adding more interior storms this year.
Why do I favor interior over exterior? Three reasons. The house looks exactly the same from the street. I can install and remove them from inside all by myself, with no ladders on the second floor. And a tight inside layer keeps warmer room air off the cold glass, creating less condensation (more on that below). Exterior storms do have one real advantage: they shield the old sash and glazing putty from rain and weather. If your original windows are already in rough shape outside, that’s worth weighing.
The research on traditional windows backs this up. Historic Environment Scotland, the government agency that cares for historic buildings, tested real single-glazed sash windows and found that secondary glazing reduced heat loss by 63%. Combined with blinds or shutters, the reduction passed 75%. That’s a huge gain, without replacing a single original window.
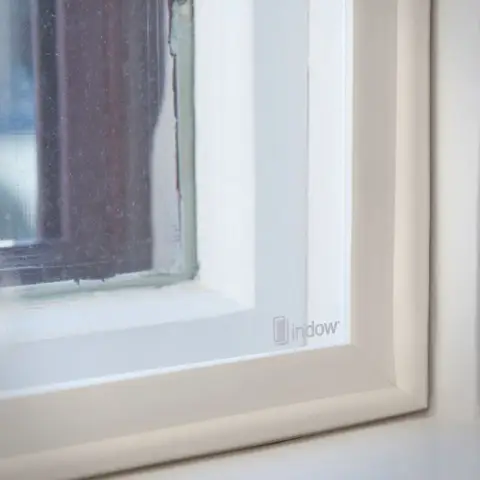
SPENDY BUT BELOVED BY OLD HOUSE OWNERS
Indow Thermal Window Inserts
Almost invisible and working 24/7 to keep your heat INSIDE.
Type: Acrylic interior storm insert Install: Press-fit, no brackets Price: $$$, custom sized
The one rule: the inside layer has to be the tightest. Warm indoor air carries moisture. If it slips past a loose interior storm and hits cold glass, it condenses, and that water can damage old sills and sash over time. Natural Resources Canada’s guidance is direct: where storm windows are installed, seal the inside window more tightly than the outside window to reduce condensation. A snug, well-fitted interior storm does exactly that.
See a little fog between the layers on a cold morning? Check the storm’s seal first.
Not ready to spend “Indow money”? Shrink film is the budget fix. You apply clear film to the window trim and tighten it with a hair dryer. It gives you the same inside layer for one winter, and it works for renters, too. One warning for old houses: the tape can pull paint off old trim when it comes down in spring, so test it in a corner first.
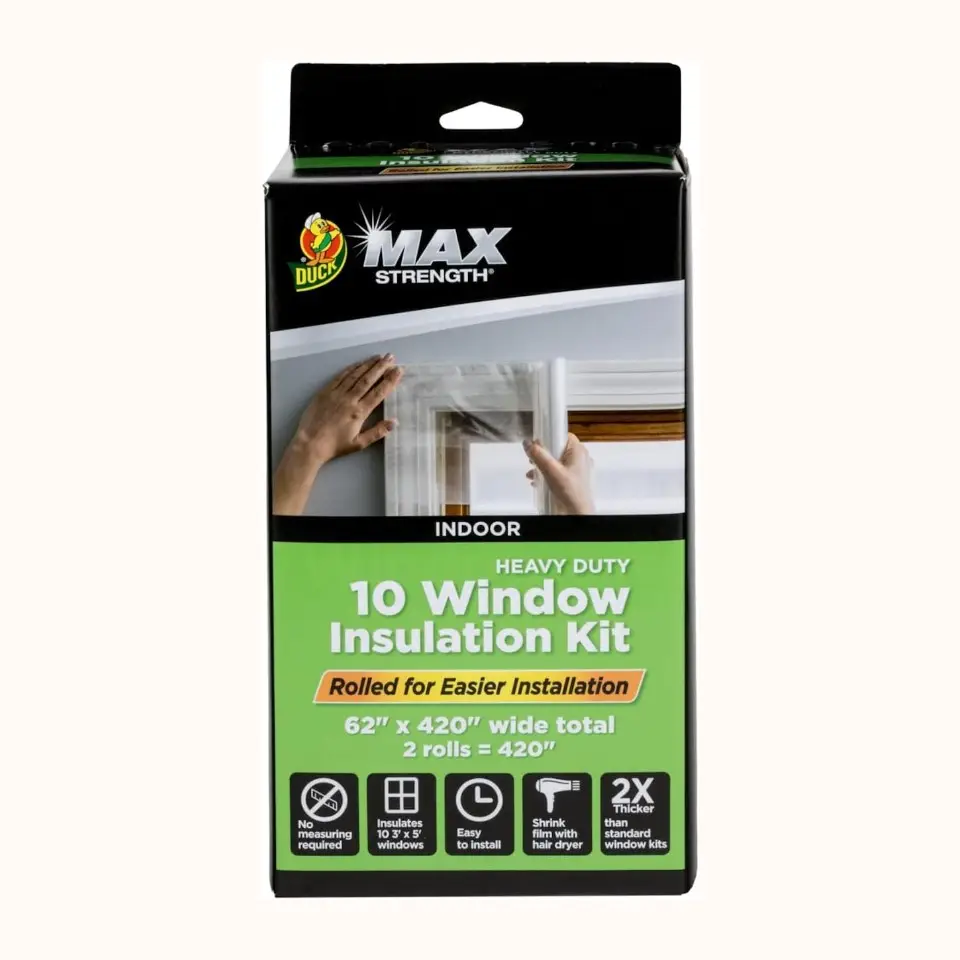
BUDGET DIY
Duck MAX Strength Window Insulation Kit
One roll, up to ten windows, one cheap winter of fewer drafts.
Type: Heavy-duty shrink film Install: Tape and hair dryer, seasonal Price: $
Do Thermal Curtains and Cellular Shades Really Help Keep Heat In?
Done right, they sure do! We’re adding new shades and curtains throughout Rosemont this fall, and every one is an outside mount. That choice is about heat, not just aesthetics.
Inside mounted shades leave gaps at the sides, and that lets colder air intrude into your room. Mounted outside the trim, with a few inches of overlap on each side, the shade and curtain cover the whole window and trap a layer of air against it. The U.S. Department of Energy’s guidance says the same: to reduce heat loss, hang draperies as close to the window as possible and let them fall onto the sill or floor.
Don’t love the look of cellular shades? Choose an outside-mounted roman shade with thermal lining (that’s what we’re doing, room by room). You’ll still get benefits, without compromising your aesthetic.
What the numbers say:
- Curtains: The DOE says most conventional draperies can reduce heat loss from a warm room by up to 10%. Historic Environment Scotland measured heavy, lined curtains on traditional windows at 14%.
- Cellular shades: Tightly installed cellular (honeycomb) shades can reduce heat loss through windows by 40% or more, which the DOE puts at about 10% heating energy savings.
- Together: Layers add up. A shade plus a curtain over an interior storm stacks three barriers on one old window.
How to get it right:
- Look for a lining labeled thermal, not just blackout. Blackout blocks light and helps a little; a thermal lining is built to insulate.
- Measure from the outside edge of the window’s trim, then add a few inches per side for overlap.
- Pick low-profile brackets so the shade hangs close to the wall.
- Close window coverings at dusk, and open south-facing windows on sunny days to let free, natural radiant heat in.
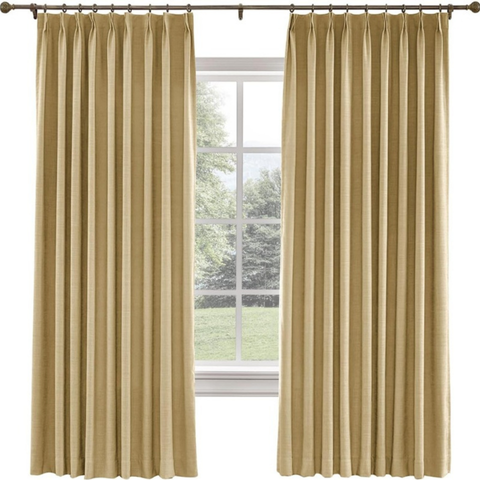
WHAT WE’RE ADDING AT ROSEMONT
TWOPAGES Liz Linen Pinch Pleat Curtain
Beloved by Lone Fox, which is where I learned about the brand. We’re adding portiéres in the entry this winter to make that room cozy, even at night.
Lining: thermal Length: floor Price: $$ to $$$ by size
Coming this winter: portières. We’re adding curtains over the inside of our entry doors, drawn only on winter nights. Victorian and early-1900s houses had a name for these: portières, heavy curtains hung at doorways to stop drafts. It’s a period solution that still works.
ANOTHER LAYER OF HEAT RETENTION
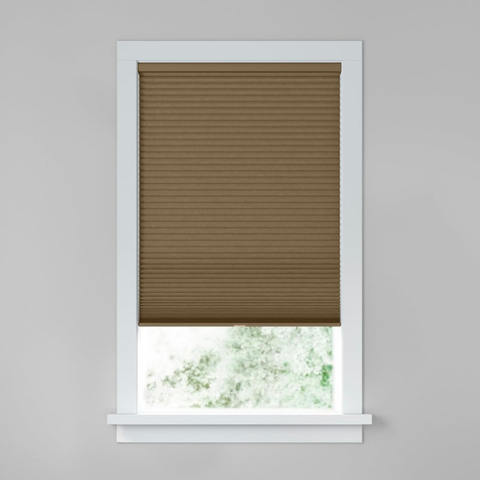
LEVOLOR Cordless Thermal Blackout Cellular Shades
Simple, effective efficiency gain. A simple addition you can DIY for real-world heat retention.
Mount: outside Lining: Blackout honeycomb Price: $$, custom sized
One “I know you probably know this” safety note: keep your curtains clear of radiators, fireplaces, stoves, and space heaters.
Which Way Should a Ceiling Fan Turn in Winter?
Warm air rises, and in an old house with tall ceilings, a lot of the heat you paid for is collecting up near the plaster. No one needs that.
In winter, set the fan to run clockwise at a low speed. Hunter, the fan maker, explains that a clockwise rotation pulls cooler air up off the floor and pushes the warm air down along the walls without creating a strong draft.
How to check and change it:
- Stand under the fan and watch the blades. In winter mode they move like a clock’s hand: top, then right, then down to the left.
- Turn the fan off and let the blades stop completely.
- Flip the reversing switch on the fan’s housing, or use the reverse button on the remote or wall control.
- Restart it on the lowest speed.
To be clear, a ceiling fan doesn’t make heat. But it will move the warm air you already have to where you are. And that’s what we all want, when the cold sets in.
Related: Best Ceiling Fans for Old Houses: 14 Breezy Beautiful Picks
This step is an easy and satisfying step in our winterizing plan, done in every room we’ll use.
How to: Warm Up a Cold Room in an Old House
In old houses, it can be (very, very) hard to get all the rooms to the temperature you want. These are some targeted ways to bring the just-right warmth exactly where you need it.
A Gas Stove (& Why We Kept a Standing Pilot)
Rosemont has gas fireplaces and stoves, and when we chose ours, we made a deliberate choice that surprises people. We kept a standing pilot instead of upgrading to electronic ignition.
Electronic ignition sounds better, doesn’t it? The pilot only lights when you need heat, so it uses less fuel, and you never have to relight it. But it requires electricity to start. A standing pilot doesn’t. That small, always-on flame generates its own electricity to run the gas valve.
In the mountains, that matters. When an ice storm takes the power out in January, our stove still heats the room, even without the generator running. The pilot that’s a little annoying in May is the reason we’re warm when the lights are out.
We didn’t give up convenience entirely. We added a thermostat remote that turns the stove on and off at the temperatures we set, so it runs itself on an ordinary evening. Low-tech where it counts, with just enough modern control.
WHAT WE (LOVE TO) USE AT ROSEMONT
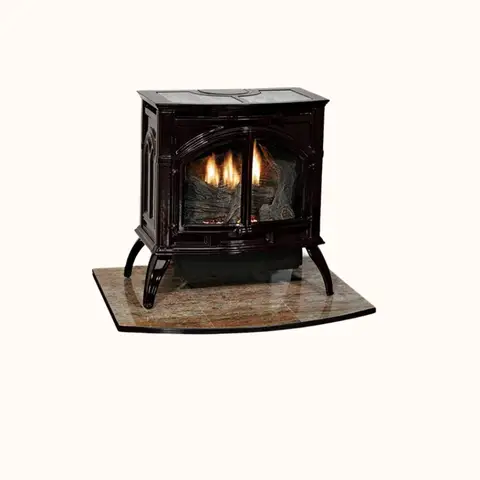
Empire Cast Iron Stove
Last year’s toasty addition to the keeping area off the kitchen. We love having this roaring while cooking dinner, and for cozy early-morning coffee.
Type: Vent-free heater Power: 25,000 BTU Finish: Black
Infrared Heat for a Room Without a Radiator
Several of Rosemont’s addition rooms don’t have radiators. Our pre-reno kitchen is one of them, and while the gas fireplace is wonderful, we don’t leave it running overnight. An infrared heater fills that gap with targeted warmth, without new pipes or ductwork.
OUR NEXT BUY
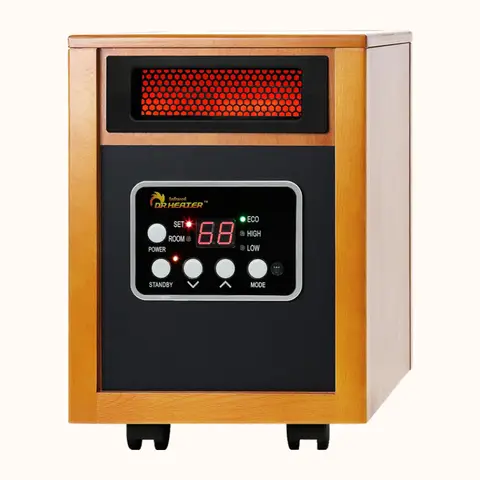
Dr Infrared DR-968 Heater
Our pre-reno kitchen’s winter plan. Targeted infrared heat in a room with no radiator, until the gas fireplace takes over at coffee-time. Not the cutest, but a sneaky modern heat source.
Type: Portable infrared heater Power: 1500W Finish: Cherry
Are Heated Floors Worth It? A Long-Term Investment, Not a Quick Fix
I’ll say it to anyone: Our heated bathroom floors are one of my favorite things in the house.
But the install is a renovation project, not a winter weekend fix. If you’re planning a room reno in your old house, read why splurging on heated floors made sense in our old house, and consider whether it should be a line item in your project plan.

USED AT ROSEMONT
Schluter Ditra-Heat-E-RS1 Thermostat
The thermostat behind our master bathroom floors. It runs the radiant heat under our slate on our schedule, over Wi-Fi, and nobody can tell it’s there.
Type: Smart floor-heating thermostat Works with: Schluter Ditra-Heat, under new tile Control: Wi-Fi scheduling
Before You Replace an Old House Heating System
This winter at Rosemont, the plan is simple: keep the heat in, move the warm air to where we live, and strategically add warmth only in the rooms we use. None of it touches the original windows, doors, or the character of the house.
The bigger question we’re researching: What heating system this house should have for the next 50 years? Our next step is a professional assessment of the house’s actual heat needs, then comparing fuel types and local rates, and keeping in mind that the heat source (boiler, heat pump, furnace) is a separate decision from how the heat gets around (radiators, ducts, floors). I’d love to keep our radiators. I’ll share what we learn.
Related: The hidden heat in our 6 ‘Sneaky Modern’ Old House Upgrades
May your winter be warm, your fuel bill be manageable, and your rooms have just the right heat to make them perfect for cozy season.
Sources
- Energy Efficient Window Coverings, U.S. Department of Energy
- How to Reduce Heat Loss from Sash Windows, Historic Environment Scotland
- Keeping the Heat In: Upgrading Windows and Doors, Natural Resources Canada
- Ceiling Fan Direction and Reversing, Hunter Fan Company