
This Post Is for You If…
- You need to know how to choose cabinet hardware for your old house — and you don’t want to guess.
- Your cabinets are old, original, or inset, and nothing measures standard.
- You’ve been burned before by a pull that didn’t fit, a finish that looked wrong in your room, or a reorder you could have avoided.
Some links may be affiliate links, meaning I may earn a small commission if you choose to purchase — at no additional cost to you.
Planning Your Old House Cabinet Hardware is Different From Knowing What You Like.

The taste part is easy — you may already know whether you want a knob or a pull, brass or bronze finish.
The expensive part is everything that happens between the product page and the installed handle: hole spacing that doesn’t match, a pull sized wrong for the drawer, a finish that read warm online and cold on your wall.
Knowing how to choose cabinet hardware is one of those processes most of us learn by doing. And that comes with a cost. That cost can be money, time, or disappointment in the final room when you’re staring at twenty pieces you can’t return.
Old houses make it a lot of little decisions even more difficult — original cabinets rarely measure standard, and a single wrong assumption about hole spacing turns a clean order into a reorder.
So do the boring part first. Map, measure, sample, then buy.
Everything below is the sequence that turns a vague “I need hardware” into an order you place once.
Step by Step: How to Choose Cabinet Hardware You’ll Love in Your Real Room
1. Focus on the Room First
Before finish or form, take a moment to consider the room you’re upgrading. What finishes are already decided? Which wall and trim colors you’ve chosen. Your target hardware finishes (even noting warm and cool can help when you’re not 100% sure on metals yet).
2. Map Your Cabinet Hardware Metals
Before you shop a single knob, decide which metal you’re working in — and let the room tell you which. Brass is warm and the old-house default. Nickel runs cooler and crisper. Bronze is deep, quiet, and period. Iron reads rustic and utilitarian. Pick the one that talks to the metals already in the room — the faucet, the lighting, the hinges — and ignore the rest. Warm with warm, cool with cool. You can mix, but only on purpose. Narrowing to one metal now is what keeps you from buying three finishes you’ll end up returning.
Related → How to Choose: Chrome vs Brass in an Old House
3. Decide Your Finish: Lacquered vs. Living Finishes
A lacquered or plated finish stays exactly as it arrives. An unlacquered living finish — raw brass, oil-rubbed bronze, polished living nickel — gets a beautiful patina that changes over time and with handling. In an old house, the living finish almost always reads more right, but it’s not for everyone. Deciding before you fall in love with a particular pull or knob helps you decide based on how you want the room to shift over time.
Related → Two Steps to Old House Metal Care: How to Get It Right
4. Make a Plan For Every Cabinet (and How You’ll Use It)
Walk the room and inventory every door, drawer, appliance, built-in, and piece of furniture that’s considered in scope. Include measurements, how often you use the cabinet, and what type of opening it is (overlay? inset?). Where a door or drawer could take either a pull or a knob, make a note of which you’d prefer (and why). This is the measure twice, order once step that turns “I need hardware” into a confident, cohesive cabinet hardware order.
As you log each opening, note not just what it is but how you’ll use it. A grip you won’t bruise a knuckle on. Something you can open with wet, soapy hands. A pull substantial enough that it doesn’t vanish under your palm. Function is the filter; everything else is styling on top of it.
Related → Knobs vs Pulls: Know What Works for Your Old House Cabinet Hardware
5. Keep the Detailed Plan at Your Digital Fingertips
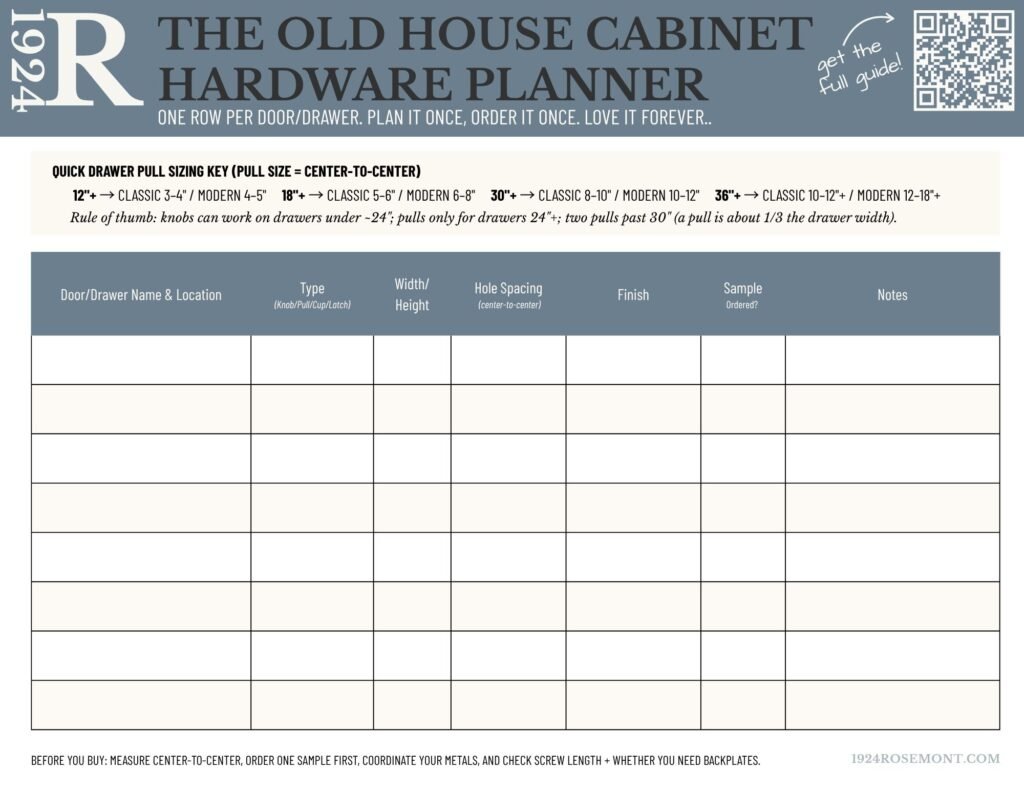
You’ll want to have the whole plan available when you need it, where you need it. For every opening, a location, type, drawer width, hole spacing, finish. That way, you’re planning from a focused design map, not from memory — and you catch any oddballs (the 31-inch drawer, the inset door that deserves a latch) before outliers cost you a reorder. If you’re planning to move or refinish existing hardware, keeping that important detail clear in your plan helps.
Related → Cabinet Hardware Refresh: How to Beautifully Update Without Replacing
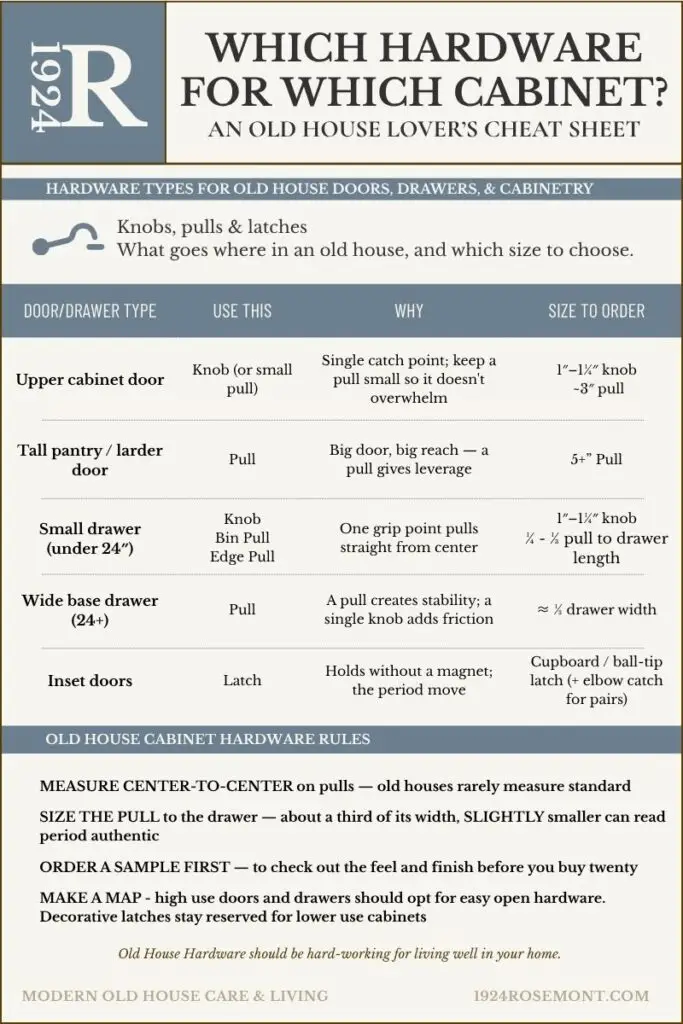
6. Size the Pull to the Drawer
A pull should run roughly a third of the drawer’s width. A stubby pull on a wide pot drawer looks accidental; an oversized one crowds a small face. Scale is what makes hardware look chosen.
7. Measure Accurately: Cabinet Hardware Hole Spacing
Knobs are one hole — easy. Pulls are two, and the number that matters is center-to-center, not overall length. Old houses rarely measure standard, so measure the actual holes — don’t assume 3″ or 96mm. Match the screw spread to existing holes, or commit to filling and re-drilling.
8. Plot Your Holes — New to Drill, Old to Fill
Switching forms means new holes and usually old ones to fill and touch up. Backplates hide old holes on the pull side and are a design decision worth making up front, not a patch later.
I can’t stress how much simpler (and lower stress) having a cabinet hardware jig makes the install process.
And if you’ve got 20 or 30 handles and knobs to install, making that job simpler is absolutely worth the investment. This $10 jig from Amazon has over three thousand reviews, and is currently rated at 4.5 stars!
Related → Cabinet Hardware Backplates: When to Use Them
9. Send for Samples: Order One Before You Buy Them All
A single knob and pull in hand tells you what a product page can’t: the real finish in your light, the heft, how far it stands off the face, whether it clears the next drawer or the wall. Approve the sample, then place the full order.
Buying from multiple sources? All burnished finishes and bronzes are not created equal. One sample of each planned hardware type ensures you’ll be happy when the room comes together.
10. Check the Unglamorous Details
It’s the littlest things that will drive you craziest. Confirm the included screws will be long enough for your door thickness — old stiles run thick, and a backplate adds depth. If you’re ordering from a slower source, sample hardware early and order before cabinets are ready, not after.
The Cabinet Hardware Planning Sheet
You deserve the (boring but sanity-saving) peace of mind a plan delivers.
Download the Old House Cabinet Hardware Planner and design a plan that works for your room. One entry per door/drawer, capturing location, type, drawer width, hole spacing, and finish.
Acting as the steward of an Old House is more drama than we expect, most times.
A plan that helps you save money, time, and is designed to help you maximize your enjoyment of the space is the reward you earned while taking care of history.
Old House Rules: Avoiding Cabinet Hardware Planning Mistakes
These are the five ways a hardware order turns into a reorder. Each one is avoidable when you make a detailed plan.
- Buying by overall length instead of center-to-center. A “6-inch pull” can have a 5-inch hole spread or a 3¾-inch one. The holes are the number that matters; the length is marketing.
- Assuming standard spacing on a non-standard house. Original cabinets were drilled by hand decades ago. Measure every opening — don’t trust one drawer to speak for the rest.
- Ordering the whole set before sampling. Finish, heft, and projection all read differently in your hands and your light than on screen. One sample saves twenty wrong pieces.
- Sizing every drawer the same. A pull that looks right on a 12-inch face looks lost on a 36-inch pot drawer. Scale to each opening, not to an average.
- Forgetting the screws. Old stiles run thick and backplates add depth. The screws in the box are sized for new cabinetry — confirm length before you’re holding a handle you can’t attach.
The Old House Cabinet Hardware Install Kit
You’ve measured center-to-center, ordered your sample, and settled on your finishes.
The last thing standing between a clean result and a row of crooked, off-center pulls is the install — and a couple of relatively inexpensive tools take the guesswork out of it entirely. This is quiet kit that makes everything else look right, easily.
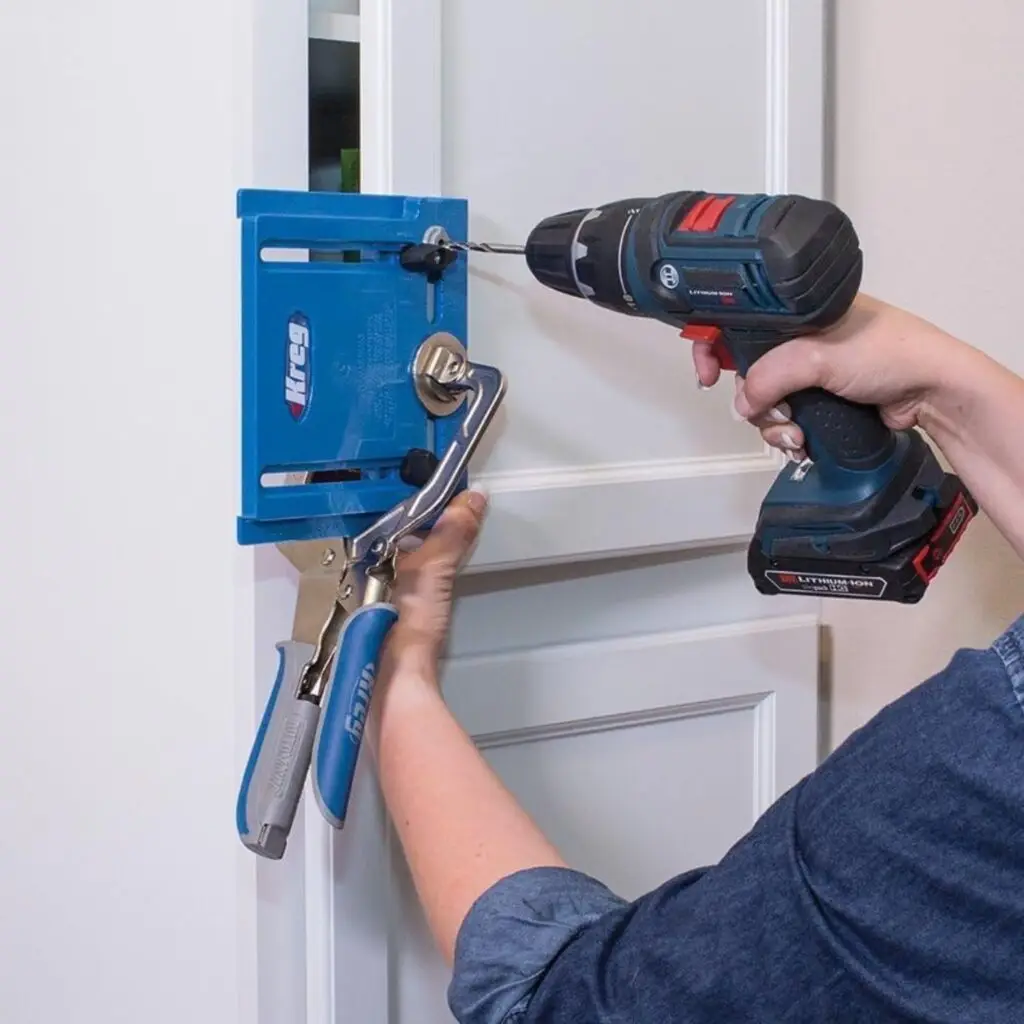
Cabinet Hardware Installation Jig ~$10–60, Amazon
Kreg for most homes; True Position TP-1934 if you’re doing a whole kitchen) The workhorse that earns its keep. It indexes every hole to the same spot, so pull after pull lands straight and identical. No measuring twice, no patched mistakes.
If you buy one thing on this page, buy this.
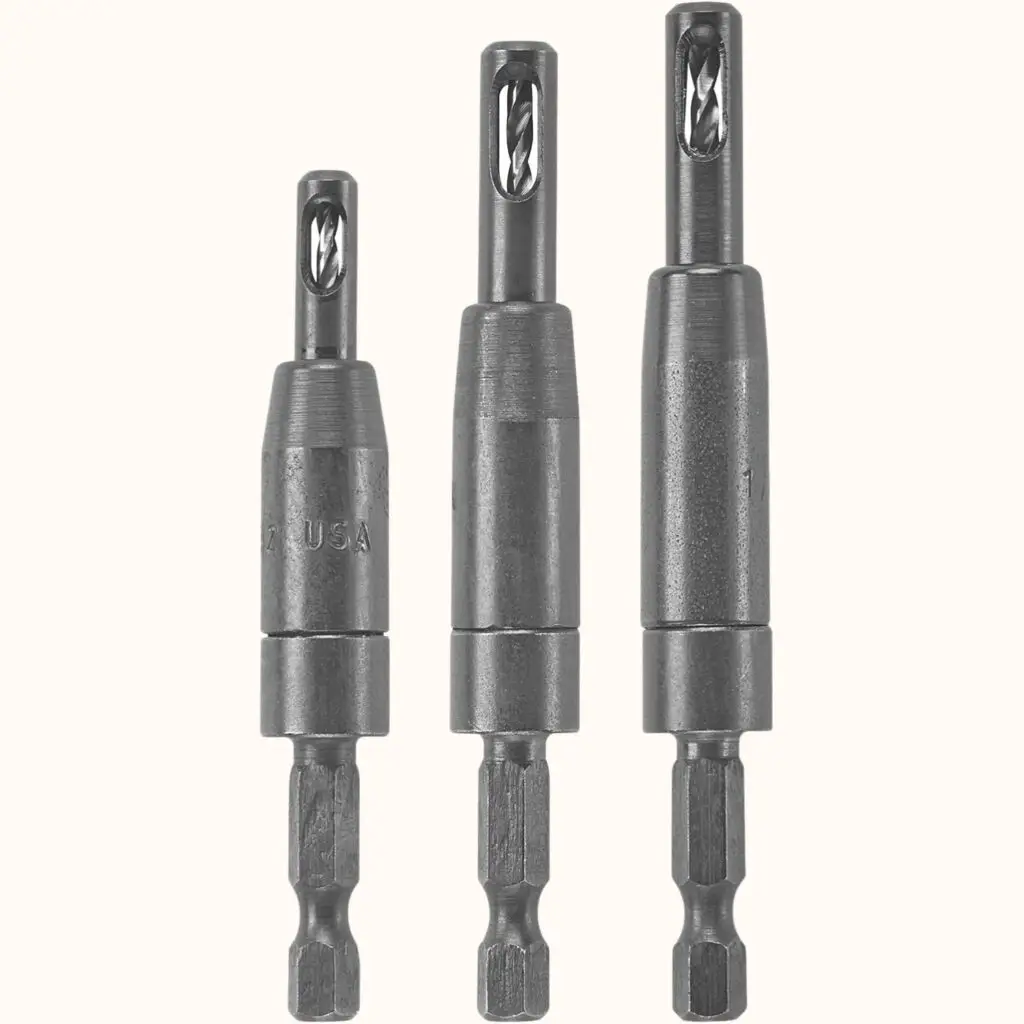
Self-Centering (Vix) Drill Bit
~$10–30, Amazon
Drills your pilot hole dead-center every time, especially for hinges and existing holes. The cheap insurance against a bit that wanders off-mark.
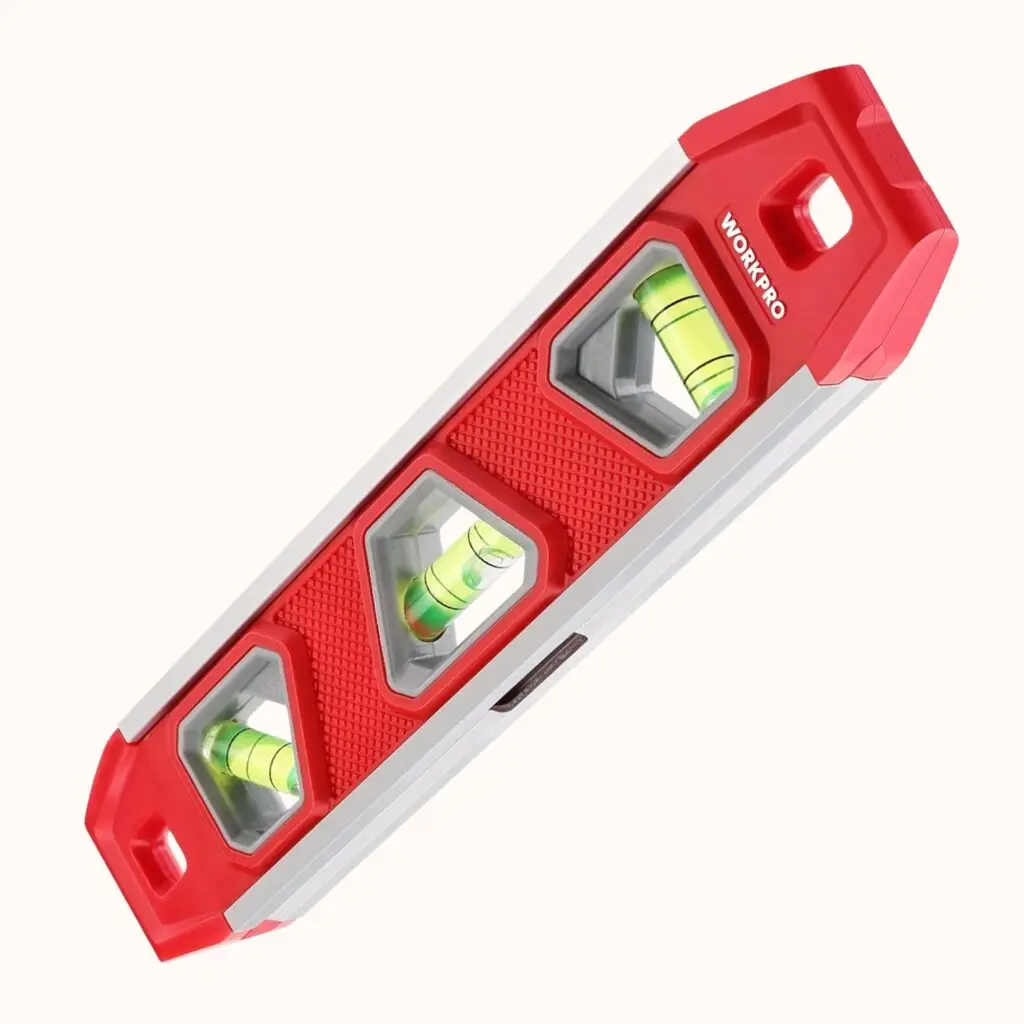
Compact Level
~$10, Amazon
A small level confirms your pulls read straight before you commit the second screw. The eye forgives a lot; a level forgives nothing — and that’s the point.
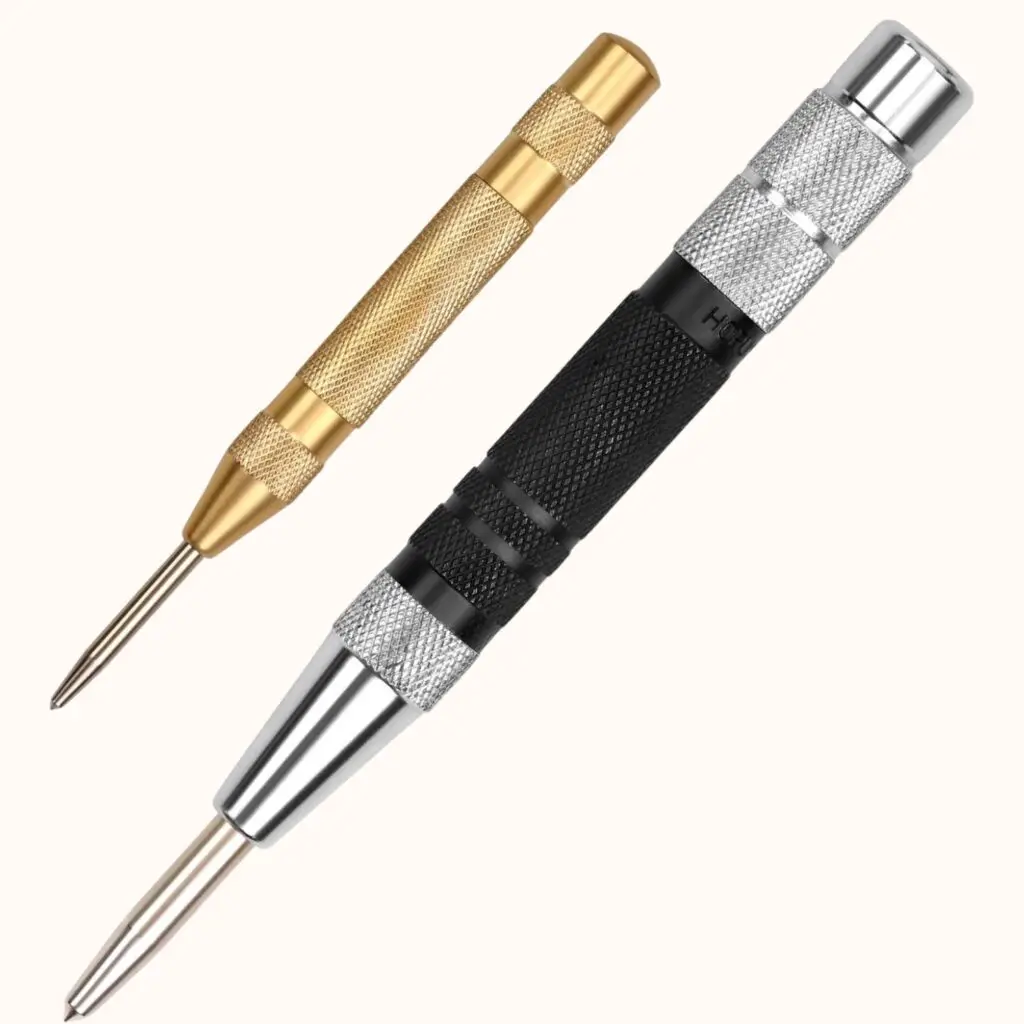
Center Punch + Painter’s Tape
~$8, Amazon
Tape the cabinet face to mark and protect the finish; the center punch gives your drill bit a divot to start in so it won’t skate.
A couple of dollars of prevention against scratched doors and drawers.
Some links may be affiliate links, meaning I may earn a small commission if you choose to purchase — at no additional cost to you. I only share products I genuinely like, would use in my own home, or have researched and feel confident recommending.
How to Choose Cabinet Hardware FAQ
Measure hole spacing center-to-center for pulls — the distance between the centers of the two screw holes, not the overall length of the pull. Knobs use a single hole, so you only need the location. Record every opening on a planning sheet, because old house cabinets rarely measure to a standard size.
A pull should run roughly one-third the width of the drawer face. A 12-inch drawer takes a pull around 4 inches; a 30-inch pot drawer can carry a pull of 10 inches or more. Sizing to the drawer is what makes hardware look chosen rather than accidental.
Yes. Order one knob and one pull first. A sample shows the real finish in your light, the actual heft, and how far the piece projects off the cabinet face — none of which a product photo reliably tells you. Approve the sample, then place the full order.
Sometimes. If your new pulls match the existing center-to-center spacing, the holes line up and you reuse them. If they don’t, you fill the old holes, touch up the finish, and drill new ones — or use a backplate to cover the old holes on the pull side.
For taste and period-correct pieces, source from specialty vendors like Rejuvenation, House of Antique Hardware, Etsy, Chairish, or 1stDibs. Keep Amazon for the consumables — filler, touch-up, longer screws, or hardware for utility spaces. Specialty sources may take longer to ship, so make your hardware plan before the cabinets are ready, not after.