This Post Is For You If…
- You own an Old House and want a visible glow up without a major renovation
- You’re tired of Old House DIY projects that don’t make it to done in a weekend
- You want to spend a Saturday making something beautiful, and enjoy the results on Sunday
Just here for the DIY dopamine hit? Jump immediately to the category calling your name → Instant Atmosphere Shifts · The “This Looks Custom Now” Projects · Embracing The Old House Patina Projects · (DIY-able) Moments of Beautiful Drama
Old house projects tend to earn their reputation for scope creep.
You pull one tile and find layer after layer of the previous owners’ choices. You open a wall and get confronted with scary electrical choices made decades ago. That’s real, and it’s part of what you signed up for.
But some projects are just: get the stuff (or use the stuff you’ve already got), do the thing, aaaaand done.
And in an old house, where the bones are already good, those are the types of projects that give us that good energy rejuvenation we need for when those other projects come along.
This is that “hell yes, this feels great” project list.
I’ve categorized 15 projects to help you find the weekend or evening glow up DIY best for where you’re at right now.
- Instant Atmosphere Shifts low-lift, high impact projects that make the mood cohesive
- The “This Looks Custom Now” Projects 100% creativity-fueled small upgrades probably already on your mental to-do list.
- Embracing The Old House Patina Projects caring for the little things that make your Old House heart flutter
- (DIY-able) Moments of Beautiful Drama bursts of unbridled, uncalled-for, but totally worth it fabulousness.
They’re home updates designed to deliver the much needed dopamine hit of before AND after without stealing an entire weekend. Or breaking hearts.
Pick one when you’re looking for an Old House WIN and need a quick addition to your DONE list.
Instant Atmosphere Shifts
The low-ish lift projects that make the room feel homier, well-lived-in, and more intentional almost immediately.
Swap Old House Light Switches and Outlet Covers
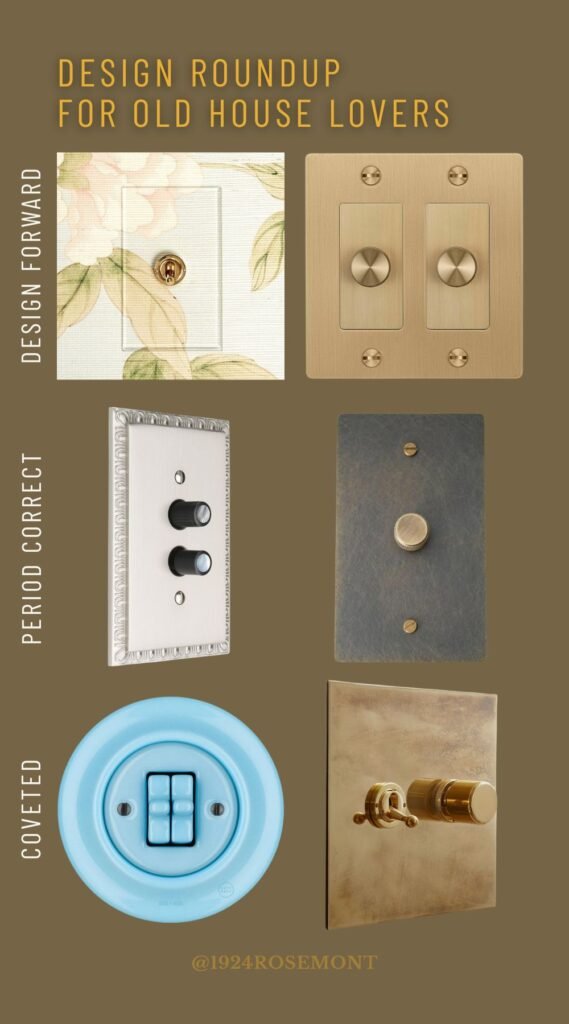
Builder-grade outlet covers are soulless plastic. Your old house – with crown molding, original hardware, plaster, and tin or wood ceilings – deserves better.
Don’t break the room’s atmosphere. Swapping out your outlet covers and switch plates to unlacquered brass, aged bronze, ceramic, or polished nickel changes adds design depth. It’s the glow up people notice without really knowing what changed — which is exactly the point.
By the way, this is a decor arena that’s having a bit of the moment right now. There are so many options that really work for old houses, at all price points. It’s a fun shopping experience, and a project you can do room by room.
Sourcing Inspiration
- Ceramic switch plate outlet covers, Amazon For old house upgrades without swapping your electrical
- Handmade owl switchplate (other styles available), Switch Hits If your house has standard toggles, you can still swop from plastic in an interesting way
- My obsession: Forbes & Lomax Invisible Lightswitch inspired by 1930’s glass toggle switches (if you go this route, you may want to get your electrician involved to swap in the toggle switch)
Read the Full Guide → The Light Switch Product Roundup for Old House Lovers
Replace Builder-Grade Bathroom Accessories

Toilet paper holder, towel ring, hand towel bar, robe hook — these are the details that are either adding to your bathroom’s design or eroding it.
A refresh of your bathroom vibe can take just a couple hours of shopping what’s already in your own home, or shopping vintage and thrift, or buying new when that’s what works best for you.
Interesting hooks in a chunky brass, or a vintage tray on the vanity can bring the vintage vibe into the room for limited time and money.
Your step one? The next time you’re in the bathroom, look around and ask yourself, “what are the ways I can add some old house atmosphere or remove details that don’t add to the design?”
Keep a punch list and refresh either as you find the right details or in a single afternoon, or as a gratifying done-in-an-afternoon project when you’ve got all your details sourced.
Sourcing Inspiration
- Pair of Chunky unlacquered brass hooks, Amazon highly rated and chonky in a way that I really love
- Wood and polished chrome solid brass toilet paper holder, Amazon I tried and tried to find this in bronze for my guest cottage, but hope to use this in chrome in the keeping room powder bath
- Solid brass German silver cup holder (or vase?), Etsy Metal Works Morocco use it however you like, it’s got a beautiful, handmade look
Read the Full Guide → 15 Bathroom Accessories That Won’t Ruin the Old House Look
Hang Café Curtains
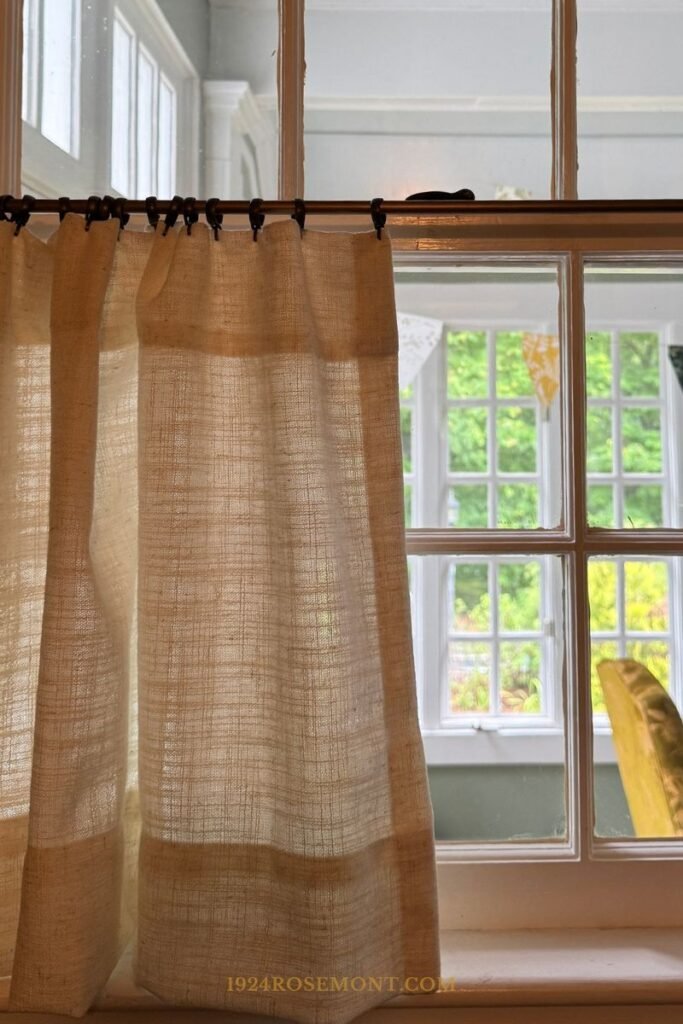
Café curtains are a stunning, simple window treatment in an old house kitchen, bathroom, or cottage room and adding them is a so-simple done-in-a-day project.
Half the window, a tension rod or simple brass café rod, and a lightweight cotton or linen panel.
Café curtains let in light, give privacy where you need it, and read as period-correct in a way that roller shades and blackout curtains just can’t.
I’ve popped café curtains into a powder bath in our entry and the guest cottage bathroom. Drew Scott from Lone Fox inspired me to find gorgeous napkins going forward to make seasonal changes easy. He’s done this in his breakfast nook and it looks incredible.
Just enough privacy, and a really easy way to finish a room.
Sourcing Inspiration
- ChadMade custom curtains, Amazon I’ve ordered these a few times and appreciate the linen look and custom sizing
- Cafe curtain solid iron 3/8″ rod, antique brass finish cut to fit, Amazon the look for less than I paid for my Rejuvenation rods, and in solid iron
- 3/8″ rodding inside mount in antique brass from Shade Doctor, Amazon they’ve also got outside mount available
Full guide coming soon.
Upgrade Your Lightbulbs
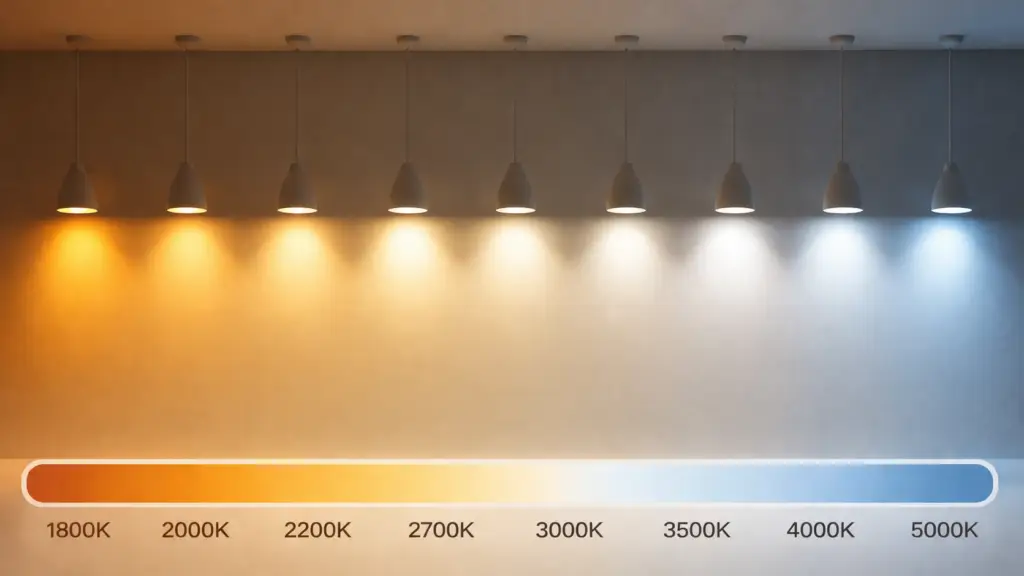
This is “DO IT NOW” project for any Old House lover who hasn’t prioritized light bulb temperature yet.
If this one seems like a boring not-really-a-project project to you I BEG you: give it a try! Your home’s lighting temperature seriously carries a ton of the emotional and design weight in you house.
If you’ve agonized over what colors to paint your walls, the light fixtures, and your window treatments but never gave the lightbulbs you’re using any consideration, it’s time.
Here’s why the right lightbulb choices are very, very important:
- Disconnected color temperatures in a room create a disconnected light, warm spots and cools spots that don’t relate to one another
- If your lighting is the wrong temperature in a room (say, too cool in the bedroom), it steals from the effect of every other design decision you’ve made
- When your lighting temperatures don’t relate or flow from room to room, the experience of living in the house is disjointed, not calming
I love finding the “rightest” lightbulbs for the mood of the house and the room, and promise you … this is a project you can do room by room and takes almost no time but makes every other decision in the room glow exactly as you’d imagined it should.
Sourcing Inspiration
- Phillips Hue White Smart Light Starter Kit I’ve used Hue in the last three of my homes. I keep my routines automated, my color temperature tuned, and my mood glowy with the app and very very little brainwork
- Philips LED Flicker-Free Dimmable Warm Glow Effect BA11 Classic Glass Light Bulb I’ve turned to these bulbs in all the chandeliers in the house
- Bulbrite 100G25HM Half Chrome 100W Globe Shape Bulb I love half chrome bulbs for modern chromed fixtures to throw the light back up into the fixture, reducing glare and setting a boutique hotel atmosphere
Read the Full Guide → The Best Warm Light Bulbs for Your Old House
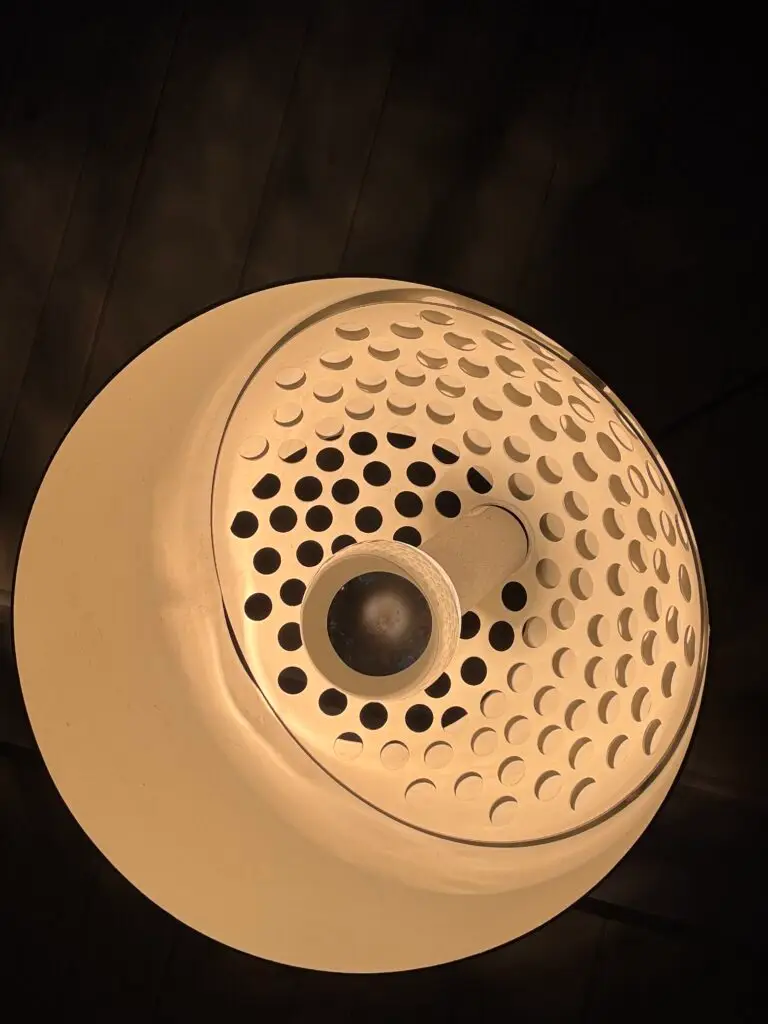
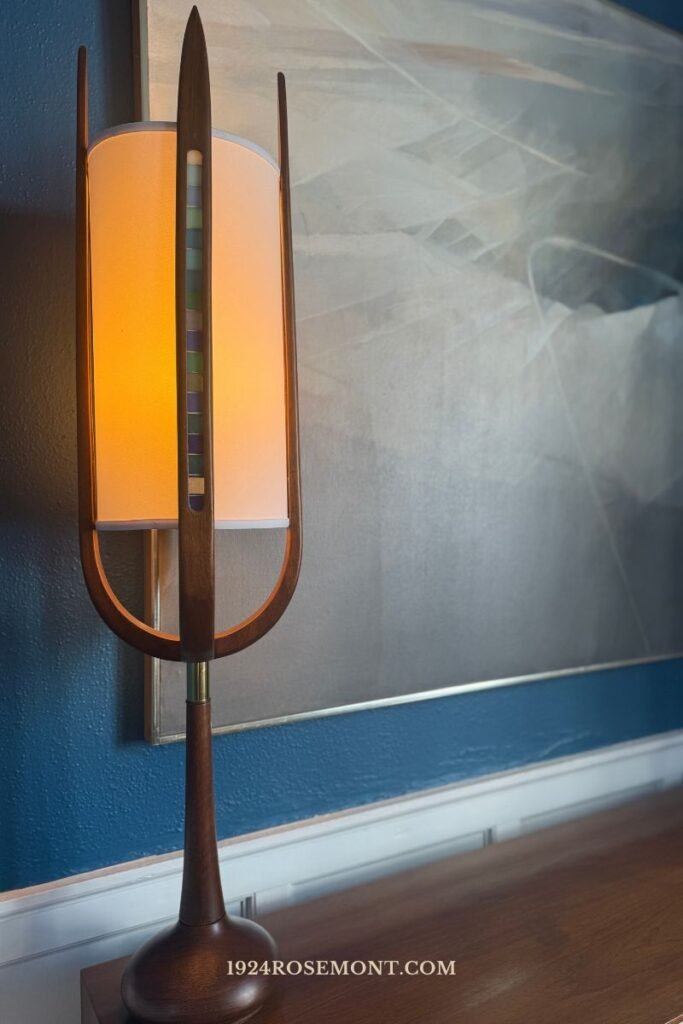
Add or Update a Lampshade
Lampshades do so much more work than they get credit for.
The right shade — a pleated silk, a linen hardback, a glass globe — finishes the fixture and can completely transform how a room reads at night. When you find the right shades, it’s an easy two-minute swap that shifts an inherited or thrifted lamp into something beautiful that belongs in your home. Old house rule: warm off-white or ivory, stay clear of stark, cool blue-white.
I source shades from Facebook Marketplace, thrift stores, and rework simple shades using fabric, trim or paint when it’s needed.
Of course, when you’ve got a stellar lamp, sometimes only a custom shade will do. In those situations, Etsy is a fantastic source for custom, but working with a local source can get you really different and considered results you may not get without having a partner in the design process.
The silk shade on the teak and glass lamp in my dining room is custom, and replaced a very tired mesh original shade that had too many issues to restore. But I’ve got other shades in the house, including the adjacent entry hall that were Facebook finds or thift store scores.
Great design is all around us.
Sourcing Inspiration
- Handmade fabric and oak wall sconce, HechoamiMadera, Etsy This shade has a fabulous texture and will likely end up in my office when I get to this room
- Moody chandelier shade set, Amazon these aren’t my normal style, but something about them has me wondering if they’d work somewhere around here
Full guide coming soon.
The “This Looks Custom Now” Projects
Zero demolition, custom cabinetry, or contractors. 100% creativity-fueled and snackable sized DIY so you can win gold in the weekend Glow Up Olympics.
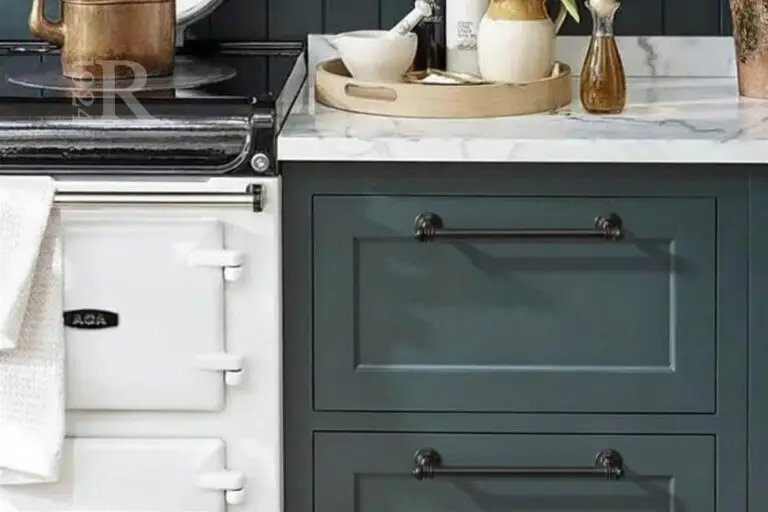
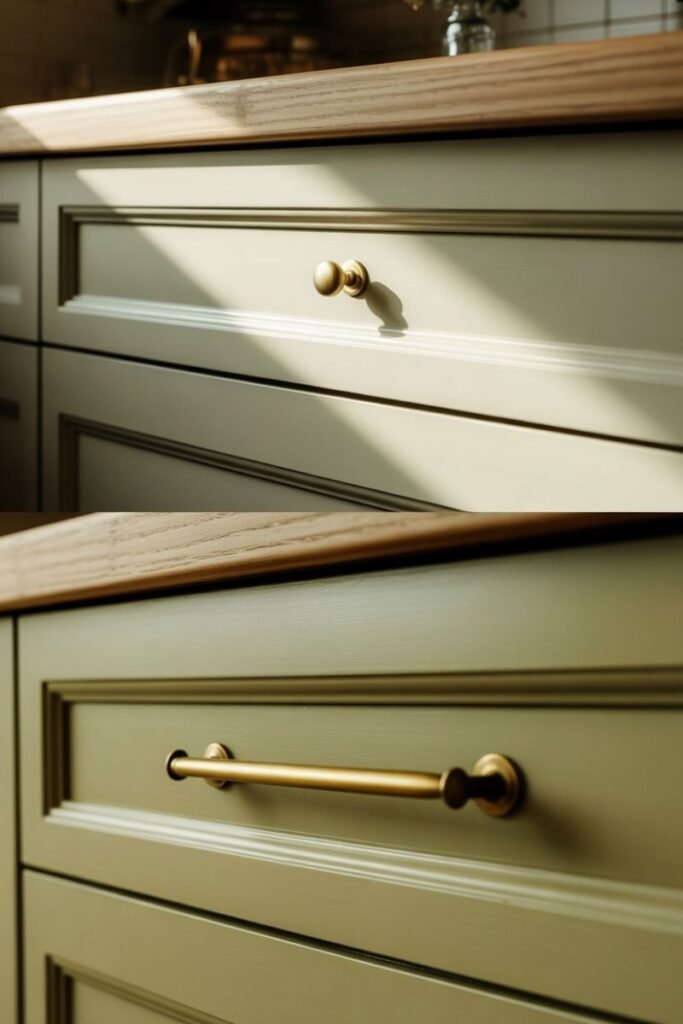
Refresh Cabinet Hardware
A definitely DIY-able, high return on investment project in an old house.
New (or new-to-you sourced vintage) hardware changes the entire read of a cabinet, a dresser, or a vanity. And once you’ve gotten the we hardware in hand, you’ll move quickly from doing the project to done. You need a jig (trust me on this one), a drill bit for pilot holes, a screwdriver and an hour or two.
The rules: measure center-to-center on your existing holes before you order anything. Period-appropriate hardware (cup pulls, bin pulls, knurled knobs) beats anything with a flat back plate and a contemporary finish.
I did this swap project in my laundry room, master bathroom, and a guest bathroom at Rosemont and they’re some of the easiest and most gratifying small projects I’ve taken on in this house.
Sourcing Inspiration
- Bronze Knurled Solid Brass Cabinet Handles You had me at knurled. These ones bring some modern tension
- Top Knobs Handle/Pull Backplate comes in an assortment of finishes and is simple, solid, and classic
- Khtumeware Cabinet Pull w/ Backplate, Amazon A highly-rated budget pick in polished chrome or nickel
Read the Full Guide → Cabinet Hardware Refresh: How to Update Without Replacing
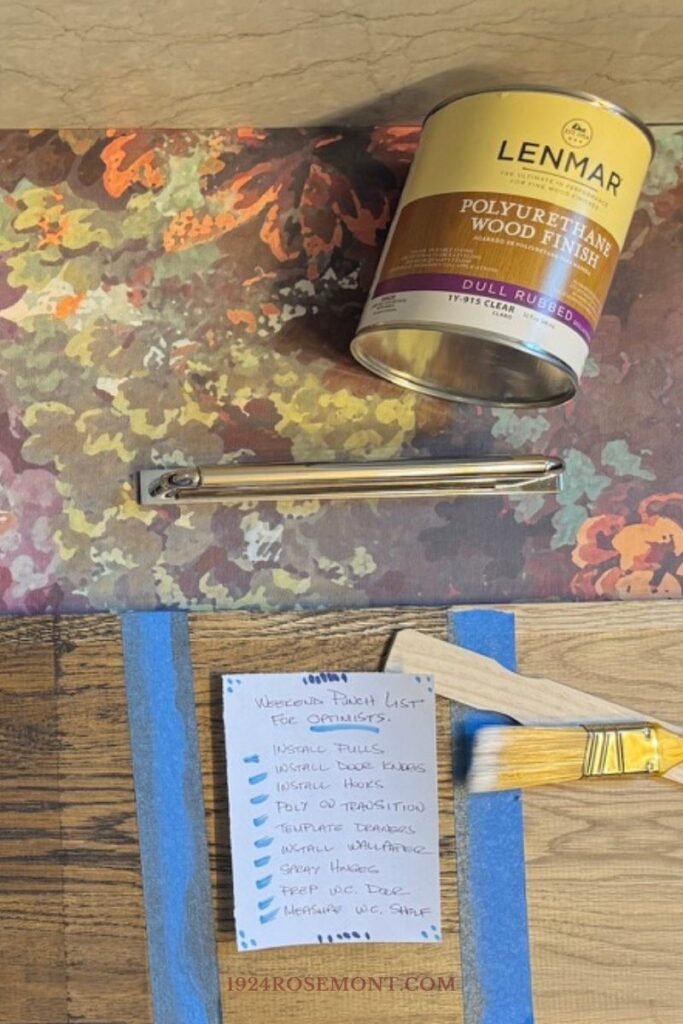
Glow Up a Bathroom Vanity
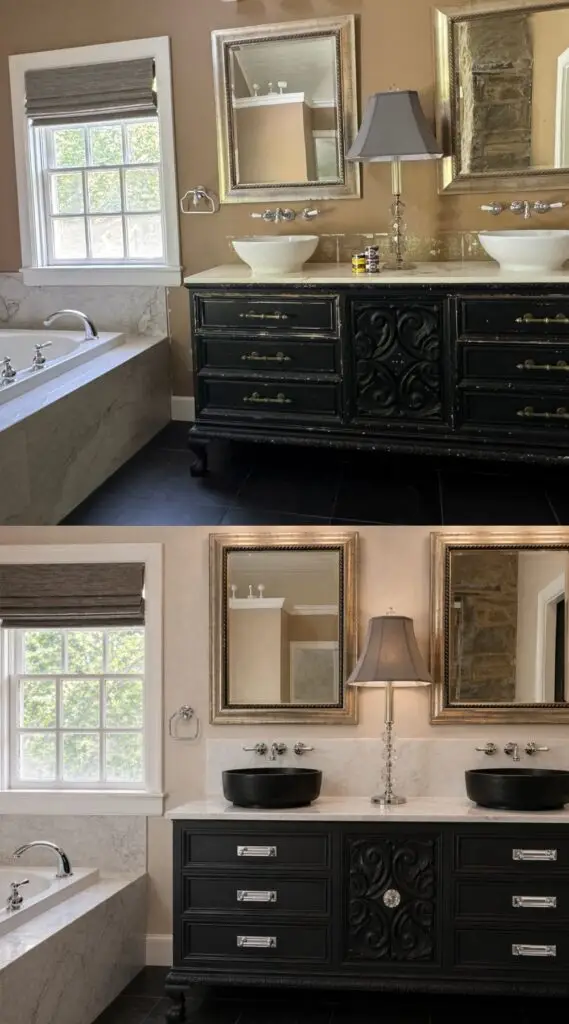
You can completely change the feel of the bathroom without fully replacing what’s already there. All in a single weekend.
Fresh paint, updated hardware, new mirrors, drawer organization, and refreshed drawer and cabinet lining can shift a tired vanity into the hero column in the bathroom.
Sure you could head to the big box store to buy a new vanity, but if that’s not your goal – or how you want to spend your budget – a DIY glow up that reimagines what’s already in the room works.
I salvaged the upcycled vintage dresser that serves as the master bathroom vanity by giving it a fresh coat of Dixie Belle’s Silk All-In-One Mineral Paint in Anchor, also swapping out its hardware, lining the drawers, sealing and repairing the marble, and replacing the sinks.
The newly refreshed vanity is stunning in the renovated room. What was a placeholder is now one of my favorite (and lowest cost) design features of the renovation. The key is treating the vanity like a piece of furniture, not a bathroom utility.
Paint and creativity go a long (long) way in this Old House DIY project.
Sourcing Inspiration
- Dixie Belle Silk All-in-One Mineral Paint, Amazon I’m using Anchor for my vanity glow up
- Heritage Charm – Botanical Tapestry by Indigo Pruitt, Spoonflower is what I used in my drawers. It’s moody and right for my room … peel n’ stick paper made it easy to do in a couple of hours
- 16″ Ceramic Sink, Matte Black, Glemon, Amazon Maybe the riskiest choice in the room, but the white salad bowl vanity sinks had to go
Read the Full Guide → How To: Update Your Old House Bathroom Vanity
Skirt a Sink, Counter, or Shelf
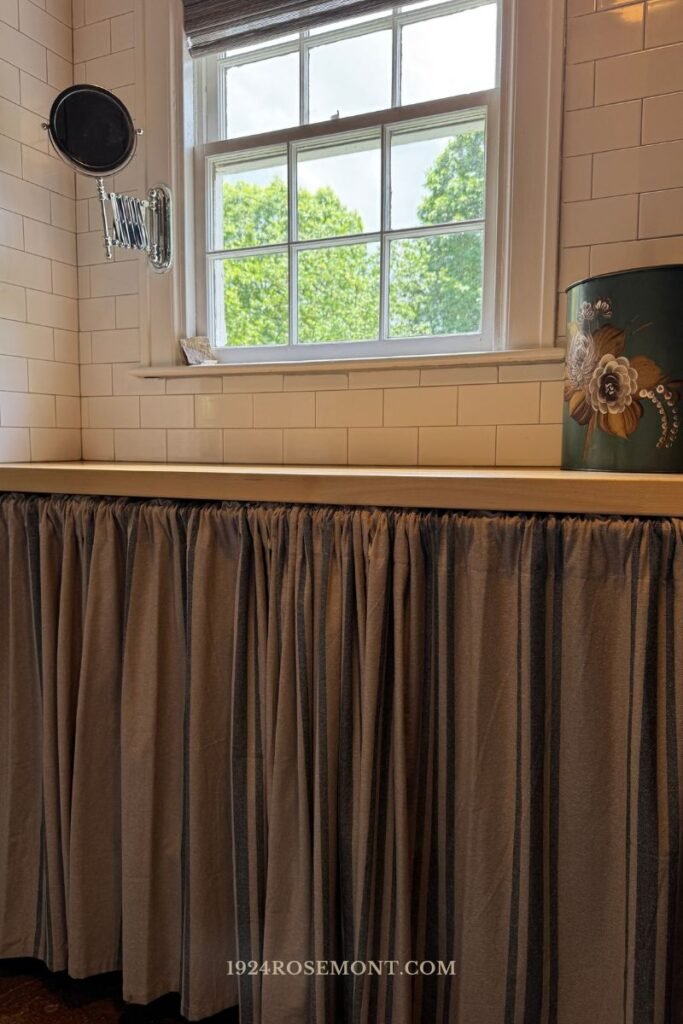
This is one of those projects that looks custom and takes an afternoon.
A gathered fabric skirt hides plumbing you don’t want all eyes on under a pedestal or wall sink, conceals open shelving under a laundry counter, or closes off a kitchen cabinet without the expense of cabinet doors.
At Rosemont I’m using skirting in a few spaces: the original wall sink in the keeping room is getting a simple skirt, the laundry counter has this burlap ticking-stripe-inspired skirt, and the guest cottage kitchen closet is also getting skirted to keep cleaning supplies out of sight.
I’ve used tension rods (like in this laundry room image), hook and loop tape, and clip rings on a café curtain rod.
Make this a completely no-sew situation by choosing curtains that work in your space or finishing a hem using iron-on hem tape.
Sourcing Inspiration
- Piper Classics Market Grain Sack Stripe Curtains, Amazon Similar to what I used in the laundry room
- Bronze tension rod, Amazon see??? you don’t even need to get your drill out!
- Industrial indoor/outdoor hook and loop tape, Amazon it’s probably overkill for sink skirt fastening, but I’d rather be safe than find my skirting on the floor
Hang a Statement Mirror
A statement mirror in the just-right spot does more work than almost any other single home decor object.
- In an old house bathroom, it frames the vanity.
- In a dark hallway, it moves light.
- Over a fireplace, it anchors the room.
Size up (most people hang mirrors too small), go period-appropriate (arched, overmantel, or gilded frames for pre-1940 houses), or add modern tension, and hang it lower than feels right.
Some of the best sources for mirrors are the vintage and thrift stores around your house, and never forget searching for local treasure on Facebook marketplace.
Sourcing Inspiration
- Floral Etched Mirror (Vintage Look for Less) <$200, Amazon This one has the vintage look, great reviews and comes in multiple sizes.
- Shaving Mirror (Classic Wall-Mounted Style) <$40, Amazon I’ve got a 1920s mirror on the wall in the laundry room and it’s such a classic look in the room
- Mid-century cherry mosaic inlay mirror, >$1000, Chairish I’m fully in love with this mirror.
Read the Full Guide → The Power of Good Mirrors in Great Rooms: An Old House Lover’s Guide
Embrace The Old House Patina Projects
The projects that let Old Houses feel collected and enjoyed over time. This is about taking care of the little things that make your Old House heart flutter so they can shine on for another hundred years.
Restore Old House Door Hardware
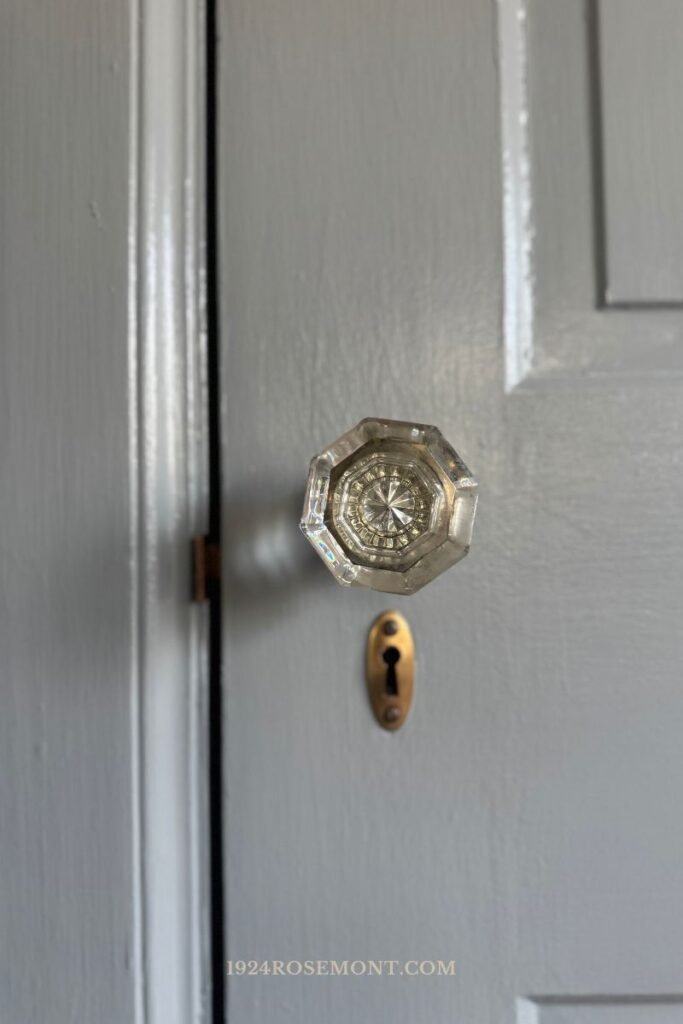
If your old house still has its original hardware — mortise locks, brass hinges, knurled knobs, skeleton key escutcheons — you have history worth restoring.
Most times, it’s just hardware in desperate need of a deep clean. Decades of paint, varnish, and neglect over solid brass that was made to last a century.
Restoration isn’t too heavy a lift: remove the hardware, strip the paint (I use a dedicated slow cooker to soak off paint), polish, reinstall.
You can do this throughout your house over time at your own pace. The result is irreplaceable and honors your old home’s history. Every hinge in Rosemont that we’ve restored has had many layers of paint hiding gorgeous copper and brass ball hinges. I’m thrilled to see the doors hung back up with gleaming hardware.
If your cabinets, doors, and windows lost their original hardware over time, search vintage, thrift, and Facebook marketplace for vintage hardware.
I’ve scored 1920s glass doorknobs for under $20.00 and hinges, hooks, and brackets for next to nothing. You can also source vintage and vintage-look door hardware on Amazon, Antique Hardware Supply, Vintage Hardware and Lighting, House of Antique Hardware, Olde Good Things, Etsy, and eBay.
Sourcing Inspiration
- Brasso Multi-Purpose Metal Polish, Amazon Polish what you’ve got to the sheen that works for you
- Vintage-look glass doorknob, Amazon Old House vibe, but new, relatively inexpensive, and highly rated
- Key holes and escutcheons, Antique Hardware Supply When what your doors deserve have gone missing
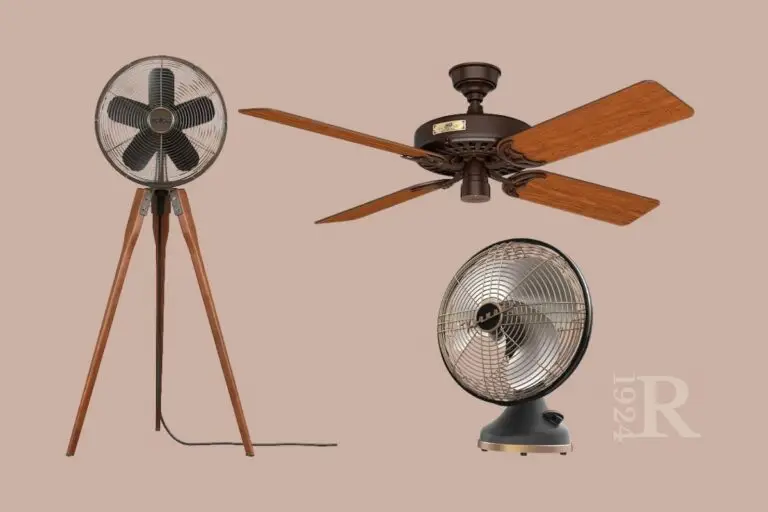
Restore and Hang a Vintage Light Fixture
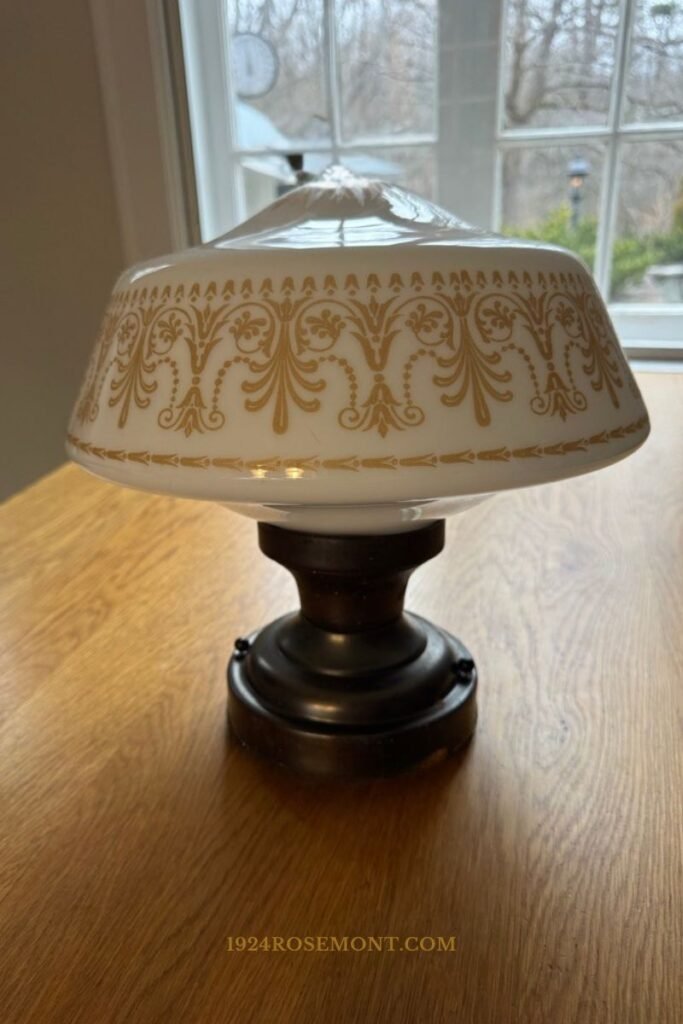
A truly great light fixture uplevels a room’s design.
Over time, and room by room, great lighting sets the tone for the house.
I could talk about lighting for hours and hours, but here’s the most important bit: be on the lookout for lighting you can put to work every time you’re in a vintage shop, Facebook Marketplace, an antique market, or estate sale.
Most of my favorite lamps lived long, happy lives before they ever got to me.
When you find that lamp or fixture that’s almost right for the room, you can work magic in just an afternoon of low-lift, enjoyable work.
My next lighting update is rewiring a vintage lamp to replace a fixture I’ve hated for years over the sink in the kitchen. Once in, I’ll add dimmable color-variable smart bulbs so I can control the kitchen’s lighting temperature, and get to work on reworking the keeping room ceiling fixture I found 1 year apart but almost matches the new-to-me kitchen fixture perfectly.
Sourcing Inspiration
- Lamp making kit, 3-way socket, cord, and essential hardware, Amazon replace those wobbly bits with safe bits
- Rub n Buff Wax Metallic Finish Golds Three Pack for when the existing finish needs a little shift. These three golds are my go-to science kit for a warm bronze-y antique in hand brass look
Related → How to Choose the just right lightbulb for the glow you crave
Create an Antique-inspired Foxed Mirror
A foxed mirror is an antique mirror with the aged, spotted patina you covet in old houses, antique shops, and boutique hotels everywhere.
You can find vintage foxed mirrors — Chairish and 1stDibs have stunning options — or you can just make your own. The DIY version uses mirror-effect spray paint, vinegar, water, and some creativity.
It takes a single afternoon and creates something that looks like its been around for 80 years. Added bonus? It’s a high-impact project that’s relatively low impact on the wallet, too!
This is a easy project that’s right at home in every old house and every newer build looking for some old house patina.
Sourcing Inspiration
- Art3d Acrylic/Plexiglass Sheets, Amazon The base “mirror” material
- Rust-Oleum Mirror Spray Paint, Amazon my go-to for mirror coating
- Rust-Oleum Matte Farmhouse Black the last step before hanging your newly antiqued mirror
Read the Full Guide → How to Get the Antique Mirror Look For Less
Recover the Dining Chairs
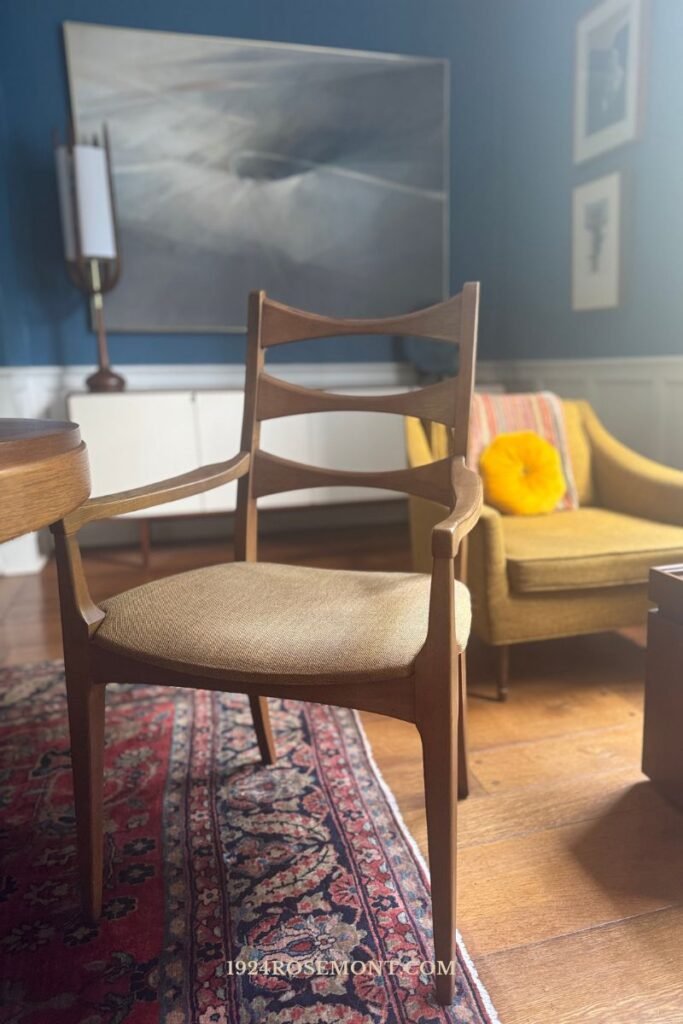
A set of fantastic dining chairs with tired, not-in-a-good-way dated, or just plain ugly upholstery is one of the most fixable things in an old house.
And one of the most overlooked. A staple gun, less than a yard of fabric per chair seat, and a screwdriver is pretty much all you need. As long as your cushion foam is still … well … cushioning, that’s the whole project.
The transformation is immediate and your choice in fabric is where the design decision lives: a period-appropriate cotton print, a wool plaid, a stripe.
Get the right-fit fabric for the mood you’re creating, and formerly MEH chairs suddenly make the room.
Sourcing Inspiration
- Arrow Electric Staple Gun Kit, Corded Stapler highly rated, and ready to help you go from “doing” to “done”
- Top Fabric I’ve shopped them for a number of projects in our house and love their vegan mohair and wide selection of velvet options
- Modern Fabrics is a very cool North Carolina-based company that sources designer interior textiles at discounted prices – think: Maharam, Knoll, Schumacher
Create (DIY-able) Moments of Beautiful Drama
Rosemont is a center-hall Colonial on the first ridge of the Blue Ridge Mountains. She’s big and beautiful, but she’s no drama queen. Still, adding a little bit of gold leaf to the living room ceiling is drama worth doing. Think of these projects as bursts of unbridled, uncalled-for, but totally worth it fabulousness.
Add Some Gold Leaf
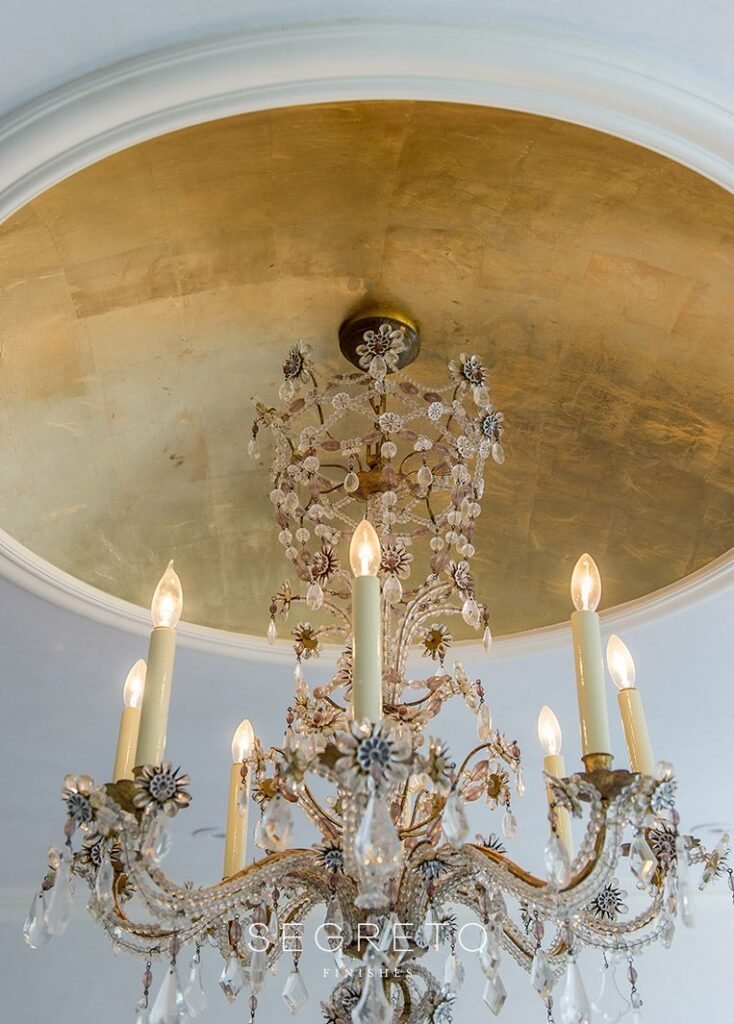
This done-in-a-day project is on my always growing “up next” DIY backlog.
I’m applying gold leaf to the living room ceiling for a glowing halo of around the Tissue Pink-painted ceiling and my ebay-find antique light fixture. It’s an afternoon with a gold leaf kit ($30–50), a sizing brush, YouTube university, and steady hands. The end effect sits somewhere between a gilded manor house and a Parisian apartment. It’s not a project I’d do in every house, or every room. But it’s going to look incredible in my room and I can’t wait to swap out my inspiration picture with my own AFTER shot.
If this gets your “I break for patina” heart beating a teensy bit faster, keep your eyes open for a place in your house that might be even more beautiful burnished.
Sourcing Inspiration
- Speedball Mona Lisa Composition Gold Metal Leaf Sheets, Amazon the thin sheets of gold for gilding
- Old World Art Gold Leaf Adhesive gets the gold leaf to stay exactly where I want it
- Speedball Mona Lisa Water-Based Sealer For Metal Leafing Projects the final touch to protect the leafing
Install a Period-Appropriate Backsplash
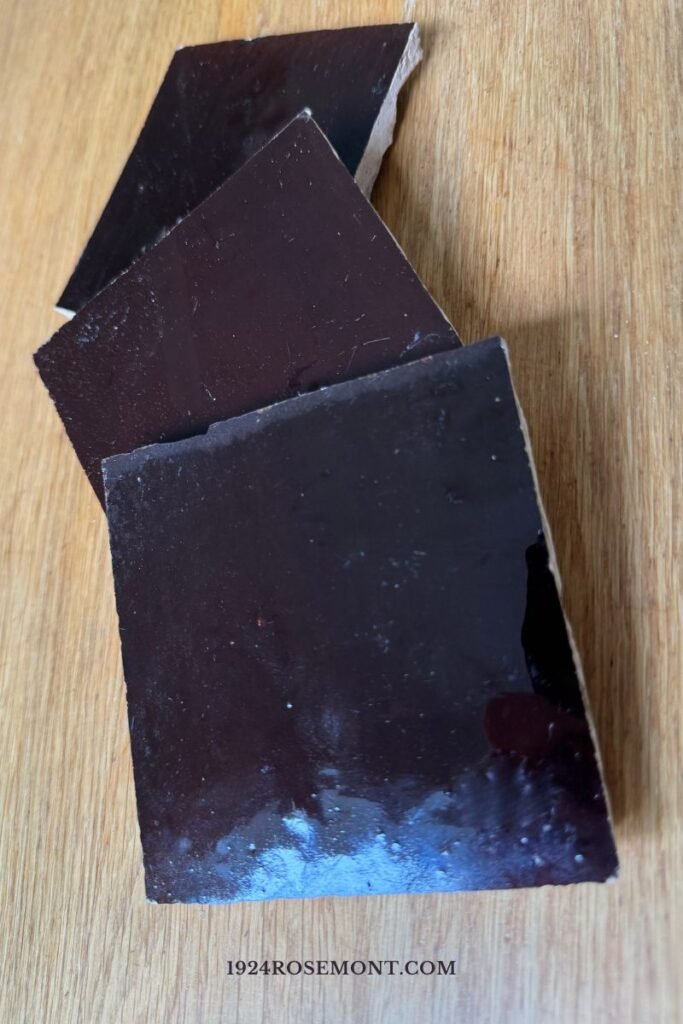
Subway tile, millwork, encaustic cement tile, zellige — any period-appropriate backsplash in a bathroom or behind a kitchen range can be a weekend project in a contained space.
Prep is the variable (removing old material, waterproofing). But the tile work itself is achievable in a day if the field is set and grouted the same day. It’s one of those “make the room” projects that really changes a room’s period character for the investment.
I’ve got two of these big bang for (relatively) low spend projects on the “up next” backlog, a kitchen backsplash in Burnt Sugar Zellige from Zia Tiles and a honed Calacatta marble backsplash in the master bathroom, which I’m sourcing from a local stoneyard remnant and having fabricated to match the existing Calacatta countertop.
Sourcing Inspiration
- Burnt Sugar Zellige from Zia Tile this color almost perfectly matches the gas heater in the keeping room
- Moisture-rated beadboard wall panels, Amazon highly rated, and PVC (not wood) but worth considering if you’re looking for low maintenance
Old House DIY Glow Up FAQs
What’s the easiest old house DIY glow up to start with?
Cabinet hardware swaps. Measure center-to-center on your existing holes first, then order. A screwdriver, twenty minutes per drawer or door, and the room looks different. The impact is immediate and the risk is zero.
Do I need trade skills for these old house DIY projects?
Most of these are assembly and swap work, not construction. The exceptions: hanging a light fixture requires comfort with basic electrical, or an electrician for an hour. Everything else — hardware, mirrors, accessories, foxed mirrors, gold leaf — really requires no trade license, no special equipment, and just your creativity.
What’s the biggest mistake people make on old house DIY projects?
Buying before measuring. Center-to-center on hardware pulls, height for mirror placement, depth for backsplash tile — every one of these has a number that matters. Measure before you order. It sounds obvious until you’re returning a set of 3″ pulls to a cabinet with 3.5″ hole spacing.
How do I make old house DIY projects look intentional rather than patched together?
Stay in your finish family. Pick one metal finish per room and carry it across hardware, accessories, and fixtures. Period-appropriate styles — Arts & Crafts, Victorian, Colonial Revival — read as intentional because they’re internally consistent. Everything in the room is from the same design vocabulary.
Shop This Story
Some links may be affiliate links, meaning I may earn a small commission if you choose to purchase — at no additional cost to you. I only share products I genuinely like, would use in my own home, or have researched and feel confident recommending.
The Full Guides
- Cabinet Hardware Refresh: How to Update Without Replacing
- How To: Update Your Old House Bathroom Vanity
- How to Get the Antique Mirror Look For Less
- The Light Switch Product Roundup for Old House Lovers
- 5 Bathroom Mirrors That Make Your Old House Bathroom Shine
- 15 Bathroom Accessories That Won’t Ruin the Old House Look